Zones & Network Segments
Schema has two different container types for grouping nodes. They look similar but mean different things, and several compliance conditions (like “crosses a boundary” or “is inside a zone”) depend on which one you use.
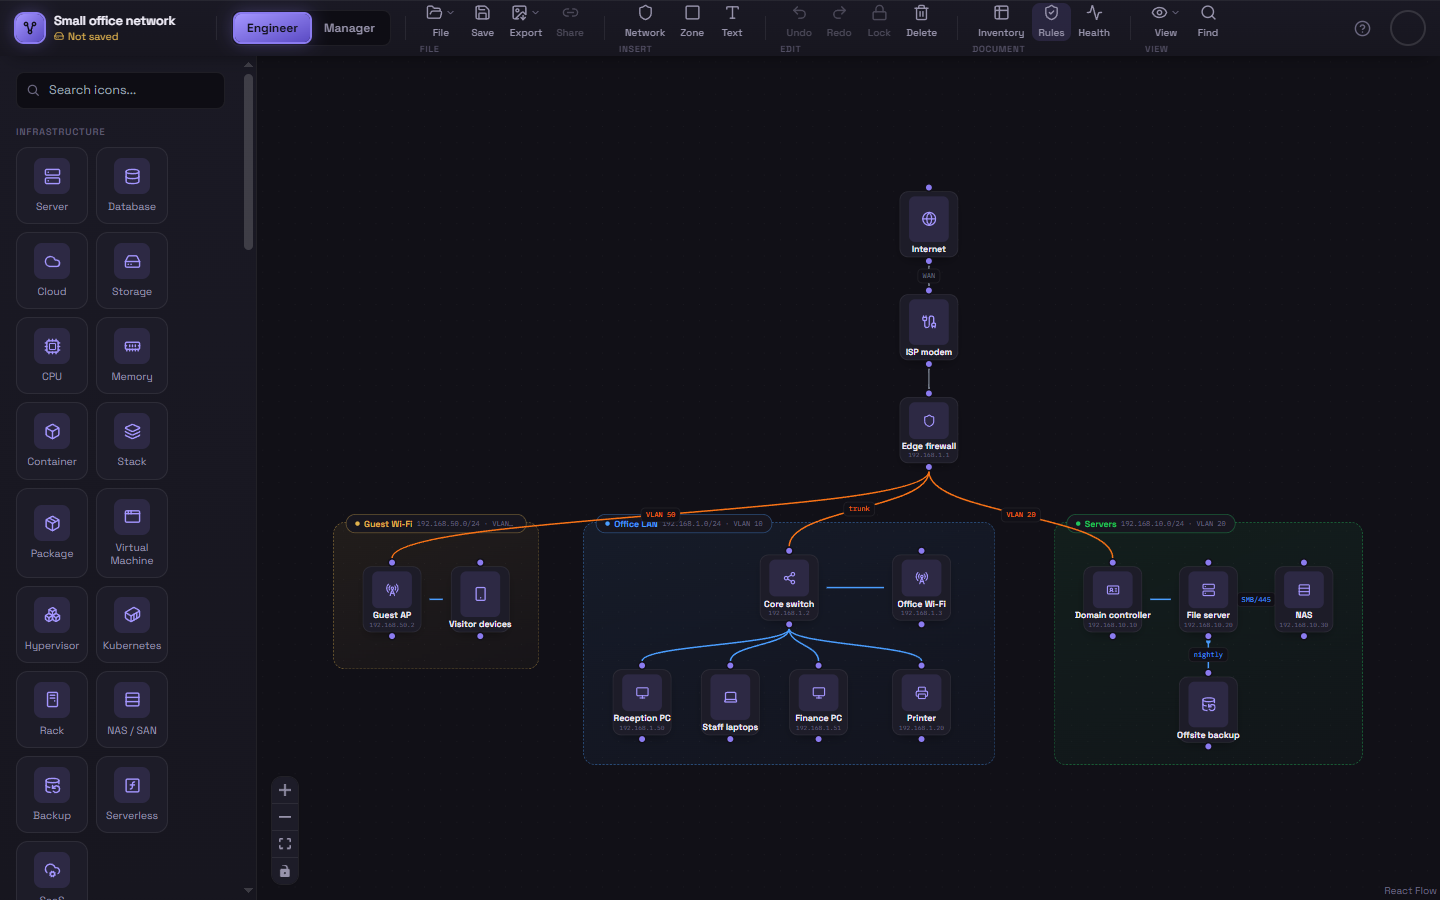
Network Segment
Section titled “Network Segment”Added via Network in the ribbon’s Insert group. Rendered with a dashed border. Use a segment for a network-level grouping — a subnet, a VLAN, a physical network boundary.
Added via Zone in the ribbon’s Insert group. Rendered with a solid border. Use a zone for a logical/security grouping that isn’t necessarily its own network — a trust boundary, a compliance scope, an environment (e.g. “Production”).
The compliance engine’s isInZone condition specifically checks for zones, not segments — see Building a Rule.
Adding one
Section titled “Adding one”- Click Network or Zone in the ribbon’s Insert group.
- A container appears on the canvas with a default label and color.
- Rename it the same way you rename a node: double-click the label pill at the top-left corner of the container.
- Drag its edge/corner to resize it, or drag the container itself to move it (and everything nested inside).
Nesting nodes inside
Section titled “Nesting nodes inside”Drag any node onto the container — dropping it inside nests it as a child. The node’s position becomes relative to the container from then on, so moving the container brings its children along. Drag a node back out to open canvas space to un-nest it.
Nesting containers inside containers
Section titled “Nesting containers inside containers”A Zone or Network Segment can itself be dropped inside another one — a segment inside a zone, a zone inside a zone, as many levels deep as the diagram needs (a “DMZ” zone containing a “DEV” and a “PRD” segment, say, each with their own nodes inside). This works exactly like nesting a node: drag the inner container until it’s fully over the outer one and release.
Once nested, the whole stack moves as a unit — dragging the outermost container carries every container and node nested inside it, however many levels deep, the same way grouping shapes works in a tool like Visio. You don’t have to do anything to turn that on; it’s automatic the moment one container is dropped inside another.
Once a nested layout looks right, lock it so it can’t be bumped by accident while you keep working on the rest of the diagram.
Coloring a container
Section titled “Coloring a container”Select the container and use the color toolbar the same way you would for a node, to give it a distinct accent color. This also affects the color of its label pill and border tint.
Nesting containers vs. spanning connections
Section titled “Nesting containers vs. spanning connections”Containers can sit side by side, and nodes inside different containers can still connect to each other — that connection will render in orange to show it’s crossing a boundary. This is one of the most useful visual signals in a Schema diagram: at a glance, orange lines are the connections worth double-checking from a security or compliance standpoint.